You may have heard of Google Optimize or seen those two red boxes floating around in your Google Analytics account. It’s effectively a tool for A/B testing, and multi-variant testing, similar to other tools like Optimizely but free (if you’re on a standard analytics account). Google’s solution is now available to everybody, and it’s ready for you to try it out.
So, how do you set it up properly? How do you start testing your website? What can you expect to see?
The advantage of it being made by Google
Really, the deep integration with Google Analytics is what sets this apart, being able to tie your experiments with your KPI’s in Google Analytics is one thing. Being able to personalise what you show your users based on your pre-defined Analytics audiences (GA 360), or user behaviour is what kills it. Quick example: I could give users who’ve come from Facebook a different experience to others.
No single website is a perfect fit for all your users.
Really, the deep integration with Google Analytics is what sets this apart, being able to tie your experiments with your KPI’s in Google Analytics is one thing. Being able to personalise what you show your users based on your pre-defined Analytics audiences (GA 360), or user behaviour is what kills it. Quick example: I could give users who’ve come from Facebook a different experience to others.
Setting up Google Optimize / Optimise
Head on over to https://www.google.com/analytics/optimize/ and get yourself signed up for free.

1. Create an Account and Container
Google may ask you to choose an account name, this could be your domain, company name, your family pets name… If you’re already signed into your Google account, it may not.
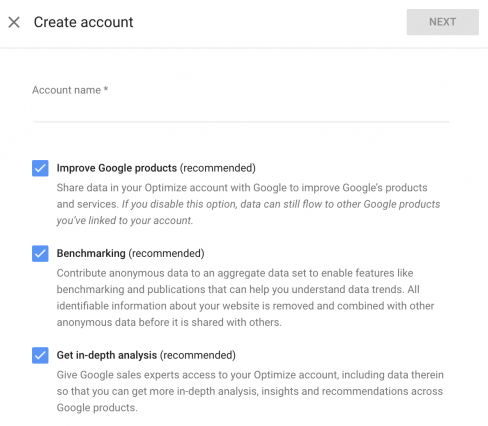
As always, it’s your shout if you want to share data with Google. We recommend it, as it allows Google to improve their products (apparently).
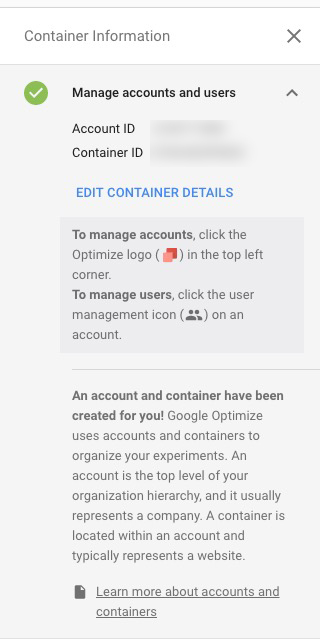
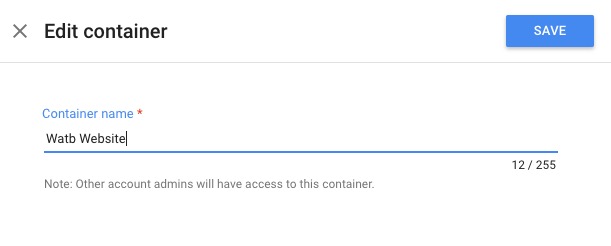
Next, you’ll want to name your container. This could be “Watb Creative Website” for example, or whatever you wish… Click the drop-down on the right, and select ‘EDIT CONTAINER DETAILS‘ to change the name.
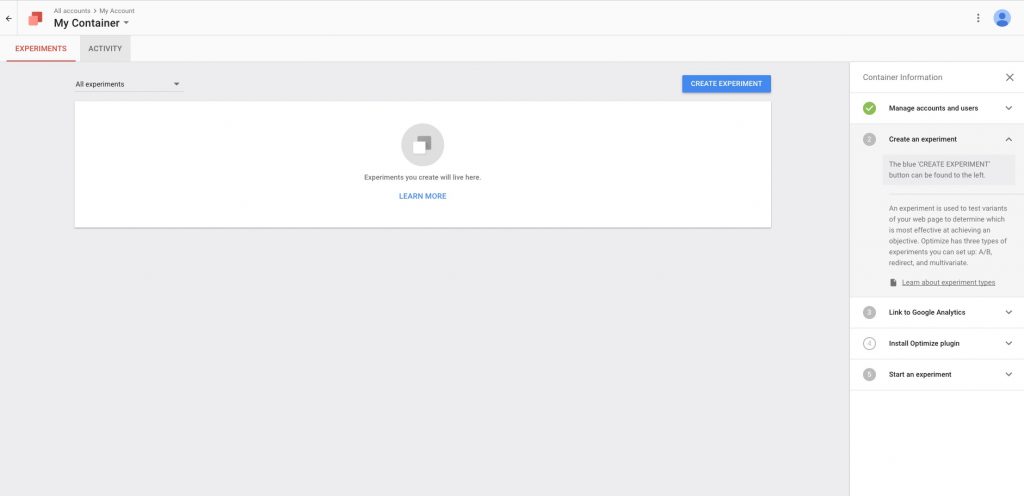
Once you’ve made the change you should end up in experiments view, and you’ll notice an onboarding checklist over on the right-hand side. Follow these steps to get yourself set up right!
2. Link to Google Analytics
You’ll notice I’ve jumped a step, after using the platform it makes more sense to me to sort this part out now before you start running experiments. It’s crucial you link your GA account so that you can view in-depth reports on your experiments. Now’s the time to expand option 3 ‘Link to Google Analytics’
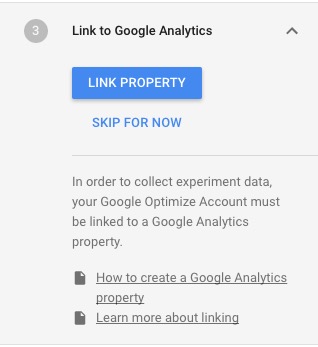
Click the blue “Link Property” button and you’ll be prompted to select a Google Analytics property.
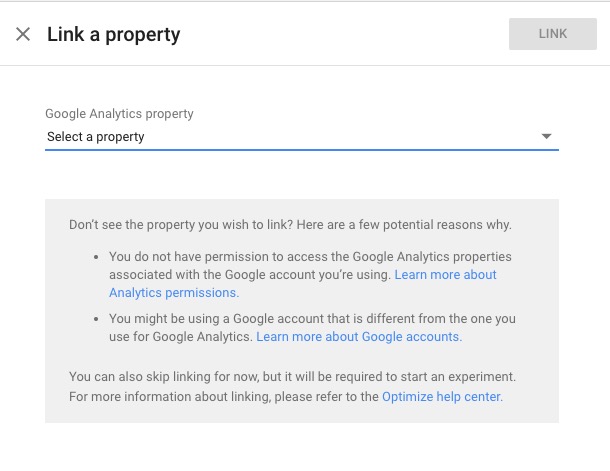
Make sure to select your property, and then the correct view, then just click ‘link’. All done.
3. Installing Optimize Plugin
You need to install the Google Optimize snippet on your site so that you can track your experiments, and also be able to change the content on your site (more on that later). This is step four on your onboarding checklist! Once you’ve clicked view plugin, you’ll be shown a popup like so…

The above shows you how to set this up by editing your Google Analytics tracking code on your website, and it’s fairly straightforward. However, I’m going to show you how to set this up via Google Tag Manager, which a lot of people use nowadays, and I feel is a better way to do it.
At this point, I will safely assume if you’re using Google Tag Manager, then you have a ‘Universal Analytics‘ tag setup already (if not, then you may be using both a GTM snippet and a Google Analytics snippet on your website. Therefore it’s best to edit your GA snippet like above instead.) If you have your Universal Analytics tag already in-place, let’s crack on.
Create a new tag, and name it something obvious; ‘Optimize‘ springs to mind. Then, choose your tag type, scroll down the list on the right-hand side and you’ll see ‘Google Optimize‘ already in the featured list.

Now you’ll need to fill out some information, follow the steps below to get the relevant ID’s:
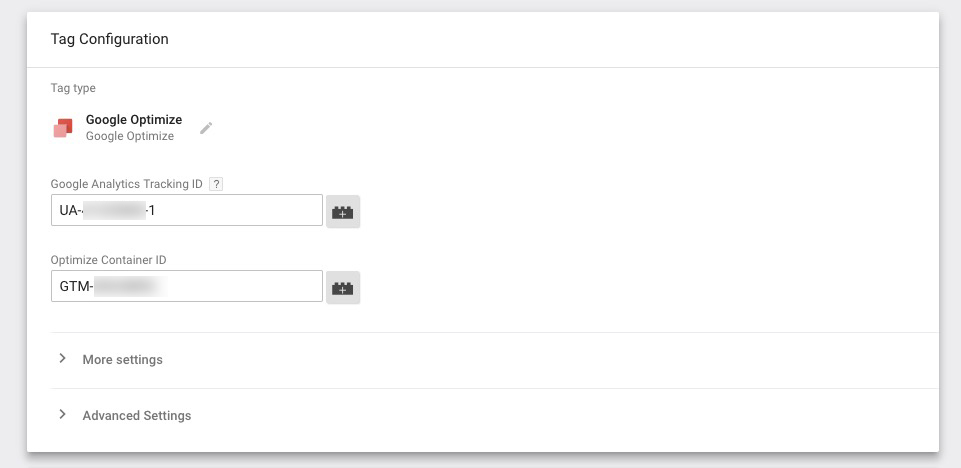
- Your Google Analytics Tracking ID, which you can grab from your Google Analytics Account by going to Admin > Property > Property Settings > Tracking ID.
- Your Optimize Container ID, which you can get by popping back to Google Optimize, and expand option 1 ‘Manage accounts and users‘. You’ll see your Container ID there, which should look something like GTM-XXXXXXX.
Now save your tag without adding a trigger. This is an important step as we’re going to want to firethe tag before your Google Analytics Pageview tag fires, and we’ll do this by making a small edit to your Universal Analytics tag.
Go back to all your tags, and open up your Universal Analytics tag, then expand ‘Advanced Settings‘. At the bottom, there’s an option called ‘Tag Sequencing‘, expand that one too and check the box marked ‘Fire a tag before Universal Analytics fires‘, and then select ‘Optimize (Or whatever you named it)’ in the ‘Setup Tag‘ field.

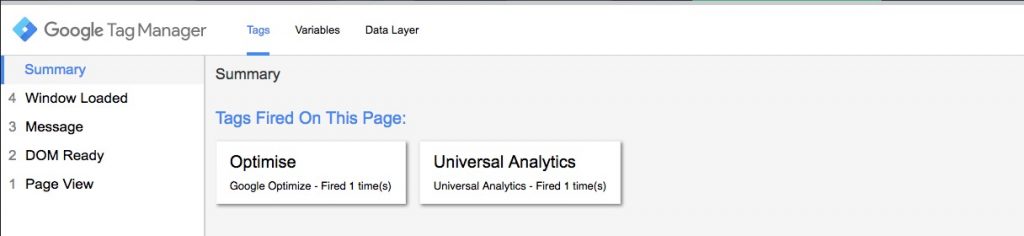
Save all your settings. Now it’s time to test the tag fires! Using the preview mode in Google Tag Manager, head on over to your website and check it’s firing in the right order. You’ll see below, I’m now firing both the Optimize, and Analytics tag in the right order.

3.1 Add Page Hiding Snippet (Optional)
This is an optional step, but highly recommended!
Google has created a page-hiding snippet to prevent the flicker effect, something that can happen when loading in dynamic content on your website. Just insert the snippet below as high as possible in your <head>, preferably just afterwards. Note: Replace GTM-XXXXXX with your Optimize container ID!
<!-- HTML generated using hilite.me --><div style="background: #f8f8f8; overflow:auto;width:auto;padding:.8em .6em;"><pre style="margin: 0; line-height: 125%"><span style="color: #408080; font-style: italic"><!-- Page hiding snippet (recommended) --></span>
<span style="color: #008000; font-weight: bold"><style></span><span style="color: #0000FF; font-weight: bold">.async-hide</span> { <span style="color: #008000; font-weight: bold">opacity</span><span style="color: #666666">:</span> <span style="color: #666666">0</span> <span style="color: #BC7A00">!important</span>} <span style="color: #008000; font-weight: bold"></style></span>
<span style="color: #008000; font-weight: bold"><script></span>
(<span style="color: #008000; font-weight: bold">function</span>(a,s,y,n,c,h,i,d,e){s.className<span style="color: #666666">+=</span><span style="color: #BA2121">' '</span><span style="color: #666666">+</span>y;
h.end<span style="color: #666666">=</span>i<span style="color: #666666">=</span><span style="color: #008000; font-weight: bold">function</span>(){s.className<span style="color: #666666">=</span>s.className.replace(<span style="color: #008000">RegExp</span>(<span style="color: #BA2121">' ?'</span><span style="color: #666666">+</span>y),<span style="color: #BA2121">''</span>)};
(a[n]<span style="color: #666666">=</span>a[n]<span style="color: #666666">||</span>[]).hide<span style="color: #666666">=</span>h;setTimeout(<span style="color: #008000; font-weight: bold">function</span>(){i();h.end<span style="color: #666666">=</span><span style="color: #008000; font-weight: bold">null</span>},c);
})(<span style="color: #008000">window</span>,<span style="color: #008000">document</span>.documentElement,<span style="color: #BA2121">'async-hide'</span>,<span style="color: #BA2121">'dataLayer'</span>,<span style="color: #666666">4000</span>,{<span style="color: #BA2121">'GTM-XXXXXX'</span><span style="color: #666666">:</span><span style="color: #008000; font-weight: bold">true</span>});
<span style="color: #008000; font-weight: bold"></script></span>
</pre></div>


